
Showing posts with label mandy. Show all posts
Showing posts with label mandy. Show all posts
Friday, February 15, 2013
My New Member
Please welcome the newest member to my blue room... A sewing machine! So thankful for my art teacher and friend from highschool gave it to me. I just picked her up from the shop where she got cleaned, tuned up and one new part! The nice elder man and ladies all said its a great sturdy machine that runs like new! Now, i need to remember the Lessons debbie taught me before hand surgery. Craftiness just a little more exciting for me!

"Sharpie" Mugs
I have an obsession with markers - it's true. Especially with sharpie markers. You walk in my blue room and you can see them all hanging by color in the cans. So, I'm always looking for new ways to use them. Now, all over Pinterest I've seen decorating mugs & bowls with sharpies. You get a mug. Take your favorite sharpie markers- decorate. Then you are to bake it in the oven at 350 for 30 minutes and poof a nice fun mug! Well... After a few hand washing the marker goes away and its not really permanent after all- bummer! I really like the simplicity of just creating with markers on a mug but knew there had to be a way to make it more permanent. So I did some digging around in my art books and thought back to my pottery days- duh!? Oil based markers! Or glass markers!! Sure enough I was correct and sorta solved the Pinterest fail.
So to make a cool hand drawn mug or bowl you will need:
- oil based sharpie markers OR glass markers (I like Decoart brand)
- ceramic or porcelain mug or bowl
- oven
- cookie sheet
1. Shake your makers really well and test them out on paper- remember these are oil based so super permanent
2. Plan out what you want to draw on your mug/bowl
3. Decorate and draw on your mug or bowl
4. Let them dry at least an hour
5. Place mugs/bowls on cookie sheet in COLD OVEN.
6. Turn oven on to 400 and set timer for 40min
7. Let mugs bake for 40min.
8. When timer goes off, turn oven off and let mugs cool in oven
9. You now have a personalized hand drawn mug or bowl!
*i have run my mug through the dishwasher on hot and it all stayed the same!
*Decoart markers colors all stayed the same while baking. However some of the oil based sharpie marker colors got a little darker.
Here are a few examples my sister an friend made with me the other day just before valentines.


So to make a cool hand drawn mug or bowl you will need:
- oil based sharpie markers OR glass markers (I like Decoart brand)
- ceramic or porcelain mug or bowl
- oven
- cookie sheet
1. Shake your makers really well and test them out on paper- remember these are oil based so super permanent
2. Plan out what you want to draw on your mug/bowl
3. Decorate and draw on your mug or bowl
4. Let them dry at least an hour
5. Place mugs/bowls on cookie sheet in COLD OVEN.
6. Turn oven on to 400 and set timer for 40min
7. Let mugs bake for 40min.
8. When timer goes off, turn oven off and let mugs cool in oven
9. You now have a personalized hand drawn mug or bowl!
*i have run my mug through the dishwasher on hot and it all stayed the same!
*Decoart markers colors all stayed the same while baking. However some of the oil based sharpie marker colors got a little darker.
Here are a few examples my sister an friend made with me the other day just before valentines.
Sunday, February 3, 2013
Hand surgery
On Thursday i had hand surgery and thankfully the surgery went well however I can't use my hand as much as I thought I could! Which has me bummed bc I don't think ill get to craft as much as I'd like too especially with Valentines Day around the corner! So, here's hoping I get creative by using my left hand and figure out ways to use what I can of my right hand :)


Tuesday, January 29, 2013
Valentines Banner
So, I love valentines day, it's one of my favorite holidays!! A day devoted to telling people you love them! Plus pink and sparkles! I recently made a quick little pennant banner to hang by my fireplace for valentines. It was super easy. I used my friends Cricut and punched out th letters. Cut burlap into triangles. Painted the edges with pink acrylic paint. Then strung it up with pink ribbon! I love how it turned out. When my entire mantle is decorated I will post pictures!


Saturday, January 26, 2013
Chalkboard Wine Glasses
I LOVE chalkboard paint! It's the school teacher in me and the artist in one medium, so fun. I have wanted to make wine glasses but never knew who or what for. Well my friend had her birthday and I thought they would make a cute gift, with a bottle of wine and some nice chalkboard pens. It took longer than expected and was a little tricker too. Drying the glasses was the hardest part making sure they dried evenly and with out any dried paint globs. I think they turned out great! Just remember...Once glasses are done, they should only be hand washed.


Thursday, January 3, 2013
The "Blue Room"
So, third room started out as a office... Then came the crafts... Thus it became the office/craft room. Well, if you also open the closet it has more crafts BUT it has my bags and clothes as well so it's now just being called "the blue room" I love the blue room! It's also bright in there bc of the windows and gets tons of light. I have been spending lots of time in it which is great. Well, I feel as though the room is pretty much organized as much as it can be. Here are the latest pictures of the peg board, which is next to my computer which also doubles as the TV. I took these pictures while Sitting on opposite side. i also finished reorganizing the back of the door organization as well! When I look at it just makes me smile. So colorful! Organized! Fun things!


Monday, December 31, 2012
Button flowers
I love buttons! There is something so fun about them all the different sizes, shapes, colors ect.. I have lots of buttons! Especially white ones, so today I thought I would make something for my sister to keep at work and thought a little flower bouquet of buttons would be cute. They are very easy to make and I think look adorable.


Monday, December 17, 2012
Holiday Wreath
I decided to FINALLY get a new wreath up on my front door. I don't really have extra money to go buy a nice real pine wreath with a big read bow like I usually do, so I went the crafty way.
 |
| You will need a wreath and some yarn-i used my friend Kaits extra read yarn. |
 |
| Tie a know around the wreath, and you simple wrap the yard around it keep it nice and tight. Now i struggled hacing this HUGE ball of yarn so I broke it down into smaller chunks, which really helped |
 |
| I made small little balls of yarn by wrapping it around my fingers. This made it a lot easier and faster to wrap around the circle wreath. |
 |
| When I got the end of the yarn, I just tied the two ends together and continue to wrap. |
 |
| Cover the entire wreath by wrapping it with yarn, you can make the wreath thicker by adding more yarn around the wreath. |
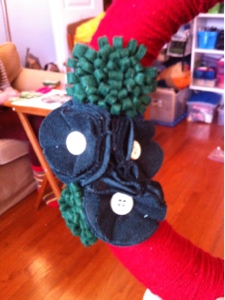 |
| I then made some green felt and velvet flowers and attached to the wreath. |
 |
| Finished product! |
Saturday, December 8, 2012
kids crafts
Today my niece and nephew came over and we had low key Christmas Crafts time. It was a lot of fun, especially since I wasnt feeling too good it was easy enough for me to sit and tell them what to do and they just had fun doing it!
 |
| Tissue Paper Snow Man: black construction paper, glue and tissue paper |
 |
| Crumple of little bits of tissue paper to make little "balls" |
 |
| draw three circles on paper and fill it with the little crumpled up pieces of tissue paper |
 |
| We added google eyes and a nose, then after i took the picture added more "snow" around the snowman |
 |
| BUTTON SNOWFLAKES |
 |
| Have a wide variety of white buttons! |
 |
| Using three popsicle sticks and wood glue, glue the sticks together. |
 |
| Using the the glue on sticks, glue on white buttons on the sticks! If you want, you can even add a little glitter. |
 |
| SOCK PUPPETS! |
 |
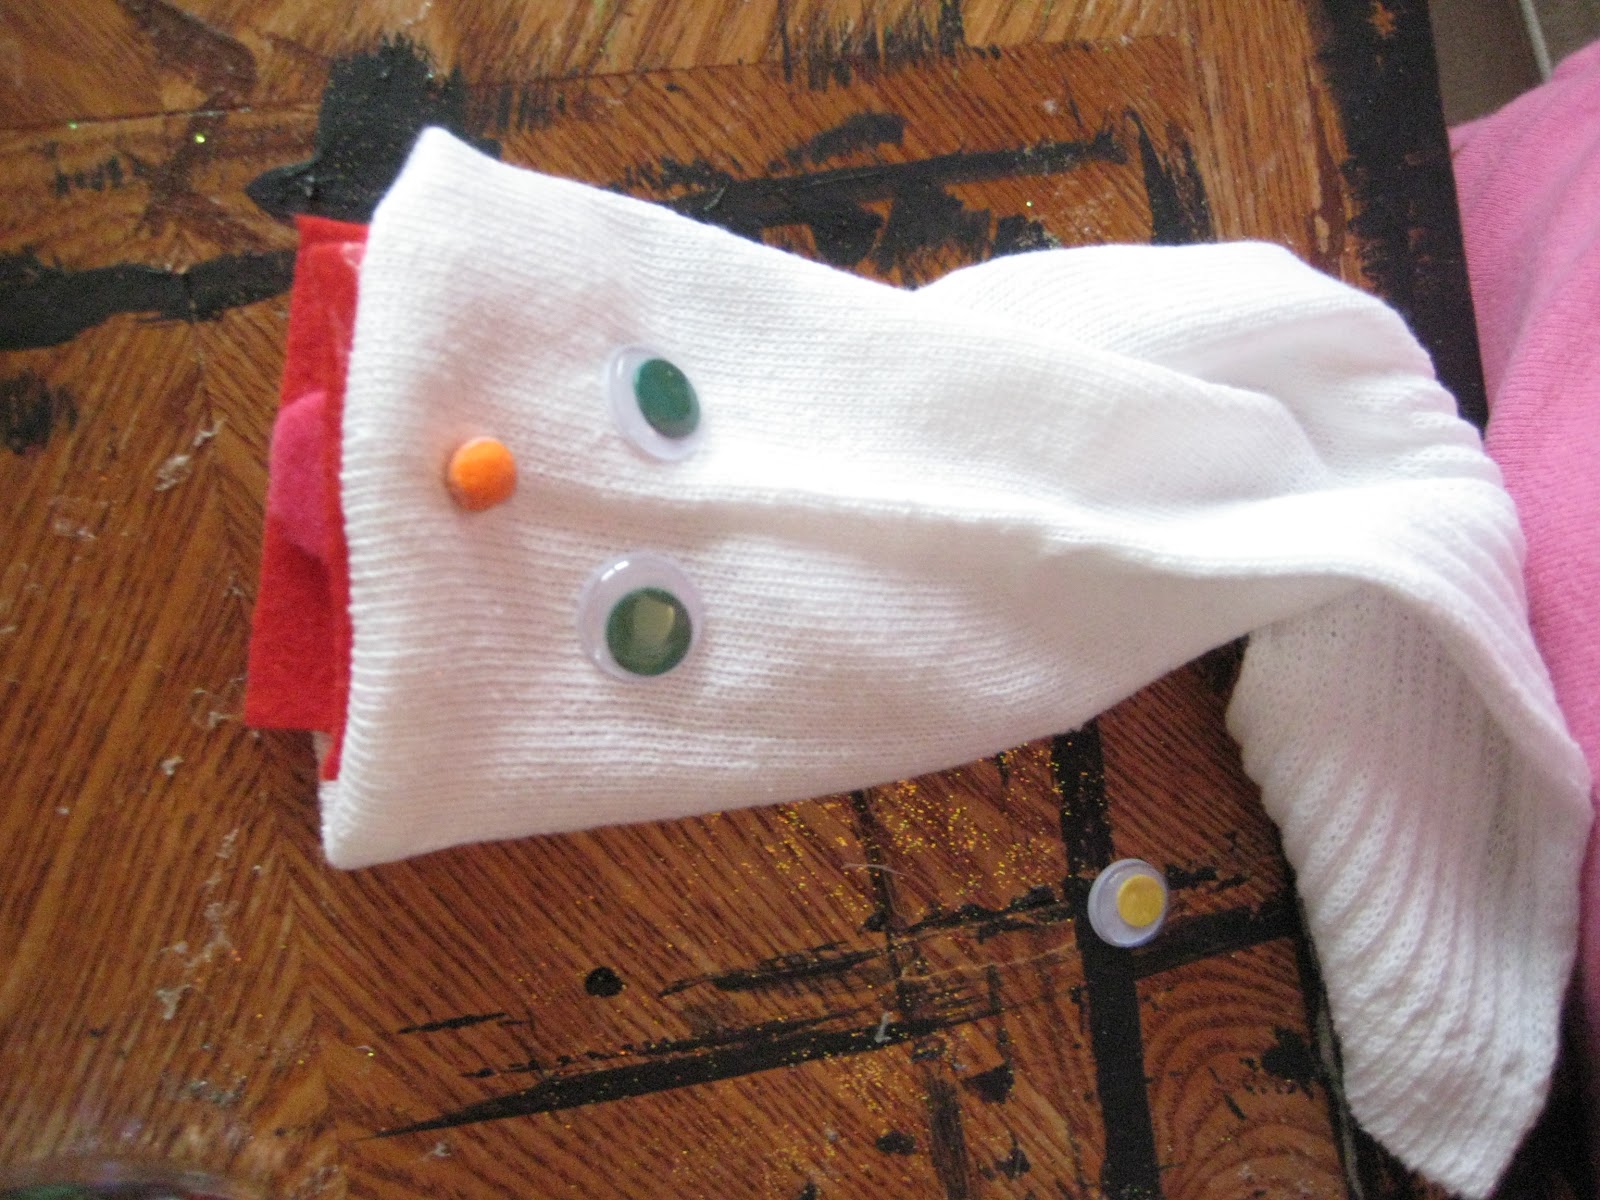
| White sock, red felt, pink felt, google eyes and buttons or sequins |


Subscribe to:
Posts (Atom)