Monday, October 22, 2012

Burlap Candles & Wreath

I have been working on putting up "fall" decorations around my house and have been getting some great ideas off of pinterest and blogs I follow. There are lots of different ideas that use burlap. I love burlap! I think it is very fallish. It just so happens that there was  sale at hobby lobby when I was in Fort Wayne - so of course I had to buy some. I used burlap for two different things around the house - sprucing up my candles and rosettes on a wreath. Today I finished my fall wreath today and put up my burlap candles. When my mantle is complete I will post pictures of that.

I used two different colors of burlap: tan and chocolate brown and brown and cream felt for the other flowers.

Finished wreath for my front door!

Burlap Candles
My four finished candles!
Materials: two types of burlap, scissors, tape and pillar candles
Because of how burlap is made its edges fray and pull apart very easily.

Using your darker burlap pull "strings" of it off your giant piece of burlap. You are going to use these burlap strings to tie around your candle so you want them sort of long.

I had four candles that i was using.  Using the lighter of your two burlaps cut a strip long enough to go around your candle and 2/3 as wide as your candle. You will see my darker burlap strings next to my cut strips.

Simply tape one of your burlap down to your candle. Wrap the burlap around your candle and tape the other end down. SO EASY! 
Noticed I frayed the tops of my burlap just for an added effect. If you like it cleaner you do not have to do that and just keep it straight, like the bottom.
 
The lighter burlap wrapped around the candles and taped down. 
Using your dark burlap strings (i used 3-5 pieces) simply tie a simple bow around the candle. If you tie it tight enough it will stay put.

The finished product! So Simple, Yet so Cute!


Thursday, October 18, 2012

Gold Satin Flower

While away this week I made my niece and her friend matching gold satin flowers and I thought they turned out great and had to share the final product. The girls LOVED them and said they were great for the fall, which I agree.  I did a tutorial here on them.


Tuesday, October 16, 2012

maître d' butter

We celebrated my mom's birthday last weekend and I got the very challenging task of bringing bread and butter. :o)  Since I lucked out on getting the easy thing to bring, I figured I'd get a little creative.  I bought some bread at Trader Joe's and decided to jazz up the butter at bit.

All I did was put 2 softened sticks of butter in my mixer (with the paddle attachment). I added about 3/4 cups finely chopped parsley, the zest of one lemon and about 1/2 a lemon's worth of lemon juice.  I added a pinch of salt (since it was unsalted butter) and mixed it all together.  Then I took a piece of foil, put a piece of plastic wrap on top of it and then dropped the butter into a long log on top of the plastic wrap.  I then wrapped up the butter (making sure it was completely surrounded by the plastic wrap - the foil would stick to the butter) in the plastic wrap and foil.  I then twisted both both ends of the foil (like you'd twist a candy wrapper).  This helped smush all the butter together in a cylinder shape.  I let it re-harden in the fridge for a couple hours (if you aren't planning on using it right away, you could put it in the freezer, just defrost it before you need it).

The verdict - it was so yummy!  It was such as simple (and cheap) way to make the boring bread and butter a little more special.  The best part is the possibilities are endless!  You could replace the lemon and parsley with pretty much anything.  Garlic! Sun dried tomatoes! Red Pepper flakes!  Or for pancakes and waffles you could go the sweet route.  Chocolate shavings! Cinnamon!  Berries!  Berry butter on pancakes sounds delicious! 

The 2 sticks made plenty for the 12 of us. If you are making this for more than 15 people, I would definitely add another stick of butter.

As a side note, I had no idea this was called maître d' butter.  I thought of it because I remembered seeing it on a blog or pinterest somewhere and just made up my own version.  My sister, who is a chef, informed me that this is what it was called.  Who knew I was so fancy!?!

Sunday, October 14, 2012

Craft Room Update!

So, awhile ago I switched my office/craft room with my guest room, so I would have use of the bigger room. I have a wonderful closet that has been transformed into fabric land and crafts. I have a craft door as well. You can see some of the switching from my other blog over here on what I had done to the closet. WELL... with leaving work my amount of office and craft supplies has increased... meaning I need to update the office/craft room and reorganize things because i have a lot of stuff! This weekend the update started. My older brother Matt came over and he help me with my peg board organization! It is still a work in progress but I am SO excited about I had to post some pictures that show how neat this room will look when its all done! SO FUN!

woo hoo big brother!

White laminate peg board from Home DePot,  then spray painted tin cans

Large heavy duty magnetic strip added in between boards

The boards are up! 

paint, scissors, tape, and lil white drawers have hair accessories in them  
currently what the office./craft room  looks like... its a process!

Friday, October 12, 2012

Waxed Leaves


Waxed Leaf Garland

Growing up my mom liked to decorate the house for the different seasons- to this day she does. One of the things I remember about fall was waxed leaves around our kitchen, especially around our giant bulletin board that hung in the kitchen. She would have us collect pretty fall leaves, press them in books, wax them and them put them up around the house. It was SO pretty. Well, I thought I would carry on her tradition of waxed leaves and make waxed leave garland to hang on my mantle. It is a such a fun and pretty way to bring fall into the house. My sister in law and her kids came over today and we went on a leaf hunt and then got to waxing the leaves! So much fun, easy to do and looks great!
~Mandy

Materials: Wax, leaves, embroidery floss, needle, pot, and metal/foil pan
Using a pot and metal tin. Boil water in the pot and put the wax in the tin on top of the pot to met the wax.
These leaves were pressed and flattened out in a book over night.
Leaves that were just collected from fallen trees - they are not pressed.
Dip each leave in the wax, and let it drip a little in the pan.

After leaves are dipped place them on wax paper to finish cooling and drying.

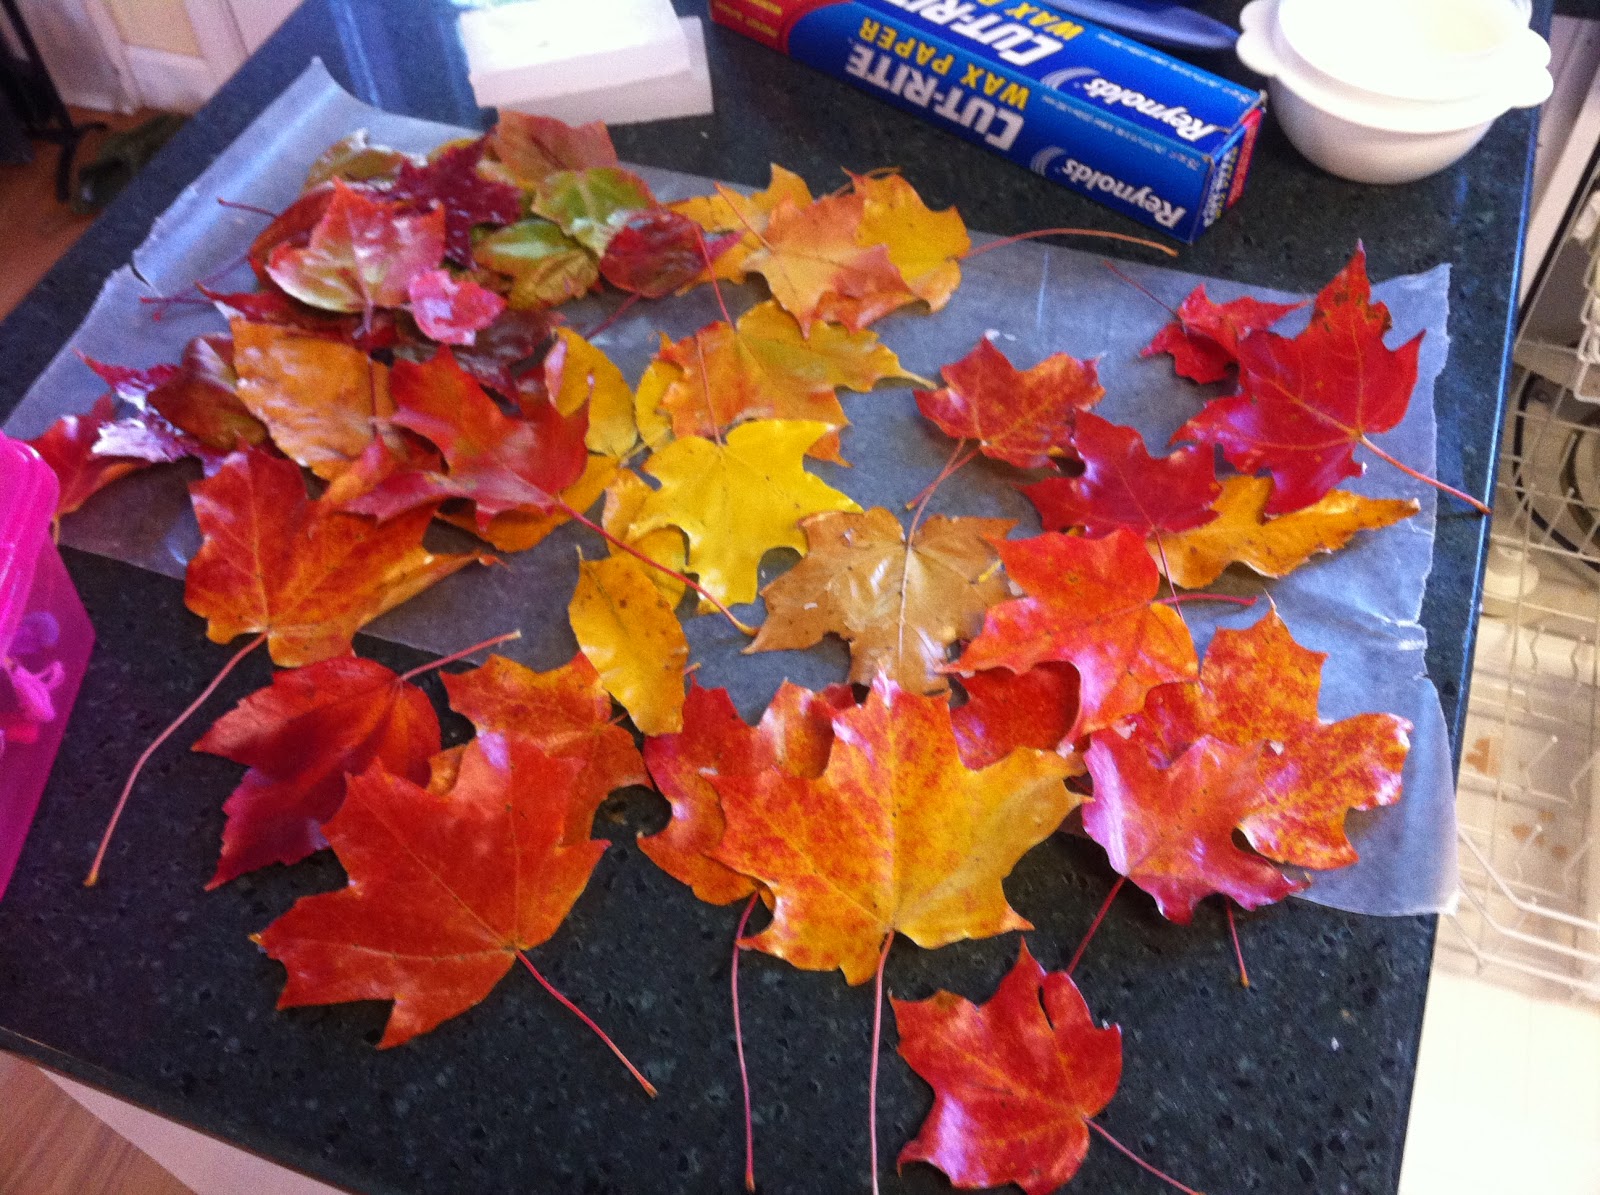
All the different types of leaves that have been dipped are "set"

With a doll needle and embroidery floss, string the leaves like you would for a banner.

TA-DA!


Thursday, October 11, 2012

Chicago Bears

It is football season for sure! and football means... CHICAGO BEARS! I thought it would be fun to make some fun new headbands and hair clips to support our Bears. It also so happens that Blue & Orange are Wheaton College colors - so that also works out nicely. I think they turned out pretty well. 

clip: cotton fabric, tulle

 headband: jeans & cotton fabric

 Headband: felt
 headband: felt
 clip: felt

  headband: felt

 hair tie: felt & tulle

New Site

With starting the blog up again...decided to change domains as well and switched to blogger!

Please look at our OLD posts from here...